Projects
QuPaths allows you to view and work with single images. However, if you will be saving and reloading data associated with multiple images it is highly recommended to use a Project.
Projects provide a way to:
Group together related images
Easily switch between images (by clicking on thumbnails in the project image list)
Organize your data files, along with scripts, classifiers and other useful things
View a larger thumbnail and some file data by hovering the mouse over an image, without needing to open it fully
Tip
Using QuPath without creating a project should be the exception rather than the rule (e.g. when wanting to quickly view an image, but not save any data).
Some commands and scripts only work within projects.
Video tutorial
Step-by-step
Create a project
Choose a folder
The first step of creating a project is to create an empty folder somewhere on your computer. You can then set this to be the project directory in one of two ways:
Through
Drag the folder on top of QuPath
Warning
The new project folder must be empty. QuPath will assume it’s allowed to do whatever you like within the folder you give it - which may include overwriting files.
For this reason, it’s best to leave the management of that folder entirely up to QuPath and to avoid adding, removing or renaming files manually within it.
Add images
The easiest way to add images to a project is usually to drag them on top of QuPath.
This opens a dialog box, which shows a list of images to import and provides some options to customize how it will happen.
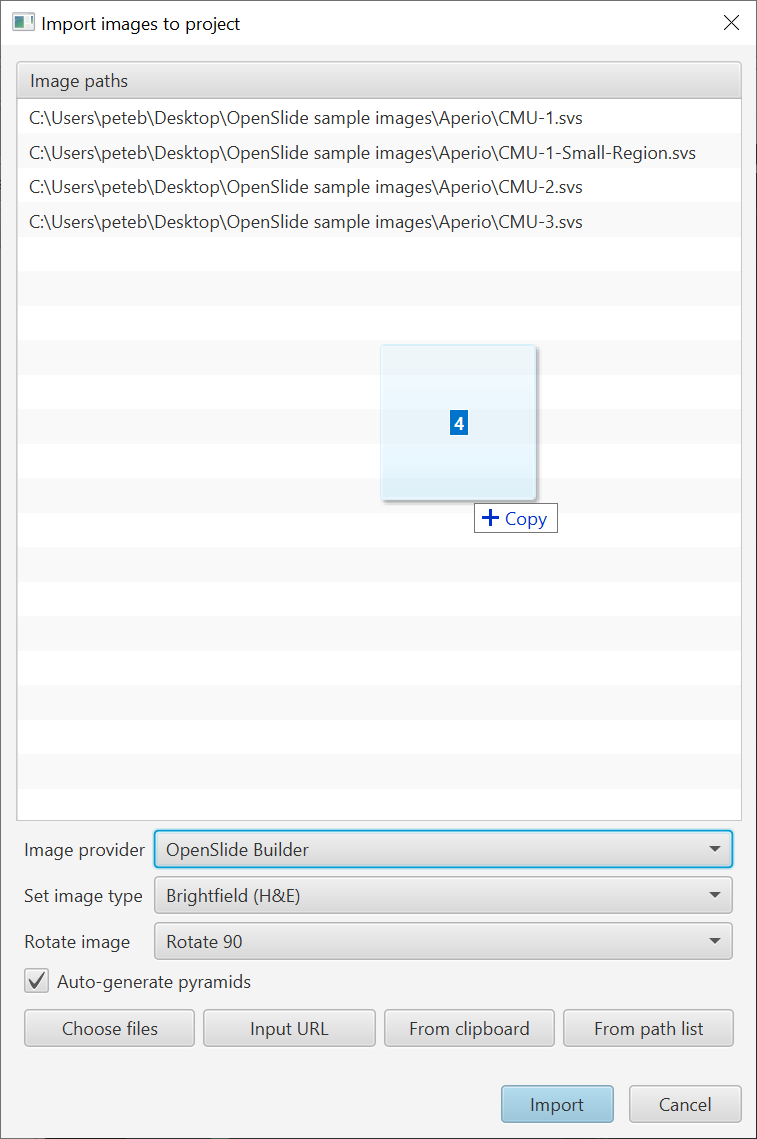
Dragging images on top of QuPath for project import.
The options are:
Image provider: This is the library used to read the images. The default is to allow QuPath to make this decision, but in some cases (e.g. a file type that you know Bio-Formats handles better than OpenSlide) you may prefer to take control and specify which library to use.
Image type: Setting the image type is often the first thing you should do when opening an image in QuPath. This can save you the effort by setting the type on import.
Rotation: Specify that the image should be rotated in an increment of 90 degrees. The file itself will not be changed, but QuPath will treat the image as if it has the new orientation.
Auto-generate pyramids: If selected, QuPath will dynamically generate a pyramid for large-but-not-too-large images (e.g. 10,000 x 10,000 pixels) that don’t already have multiple stored resolutions. These images are small enough to fit in memory, but big enough to be unwieldy. For most whole slide images (which are already pyramidal) this has no effect.
Tip
You can also use to add multiple images to a project. This option is especially useful if you have a text file containing project URIs for images strewn across a file system, since these can be pasted into the dialog in one go.
Tip
You can also merge projects using the Add images dialog. Simply add the project.qpproj file from another compatible QuPath project to bring all images into the current project.
Remove images
You can remove images by right-clicking one or more entries under the Project tab and choosing .
You can choose whether to also delete all associated data from within the project (e.g. annotations). If you choose not to, these files will linger around - you won’t be able to access them easily (because the image isn’t in the project), but they may be retrievable in an emergency.
Note
On platforms that support it, QuPath will try to remove data by sending it to the recycle bin rather than permanently deleting it immediately.
Working with projects
Reopen a project
There are four ways to reopen an existing project:
Drag the project folder onto QuPath
Drag the
qpprojfile within the project folder onto QuPathUse
Use
Fix paths
It is important to recognize that your project folder does not (usually) contain your images. Rather, it contains QuPath’s associated data files only - and the paths to where your images are located.
This means that if your image files change location, QuPath may not be able to find them any more.
QuPath previously left you on your own to somehow fix that. Now, it tries to be more helpful by providing a dialog box to fix the paths when needed, highlighting those that are missing in red.
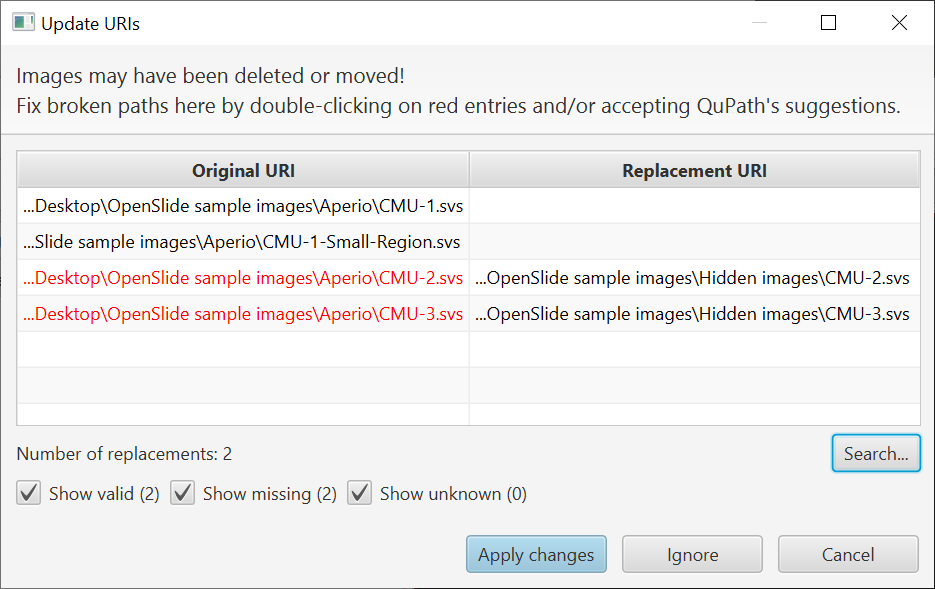
Finding missing images when opening a project
Within this dialog, you can double-click the space beside a ‘red’ entry and locate the file. You can also press the Search… button and choose a directory, after which QuPath will try to fix the paths for all missing names that can be found within this directory.
If you choose Apply changes then your project will be updated with the new paths. If you choose Ignore then your project will not be overwritten, but some images will not open.
Tip
In the event that your images and project both changed location together, QuPath will try to resolve the paths relative to the project and suggest how you should update them automatically.