Exporting images
This section describes some of the many ways that images can be exported from QuPath.
Export commands
Original pixels
Two commands make it possible to export images containing the original pixel values:
Original pixels will provide a drop-down list of available file formats that support the current image. This can vary for different images: for example, JPEG or PNG cannot be used for most multichannel fluorescence images, since they cannot support these values, whereas an ImageJ TIFF can.
You can also specify the amount to downsample the image. If an annotation is selected, only the region of the image corresponding to that annotation will be written to the file.
OME TIFF is the export command capable of writing image pyramids. In this way, it can support much larger images than Original pixels – but only in one format (i.e. OME-TIFF). Nevertheless, you can still customize the compression within the TIFF and the number of pyramidal levels.
Warning
‘Original pixel values’ is occasionally an aspirational term. Exporting an RGB image as a JPEG, for example, may introduce new compression artefacts that mean pixel values are not identical – but should be close to one another. The point is that no bit-depth or channel conversion is involved.
Rendered images
Images within QuPath can have different numbers of channels and various bit-depths, but when they are displayed they generally need to be rendered as 3-channel, 8-bit RGB.
There are two main ways to export such rendered RGB images:
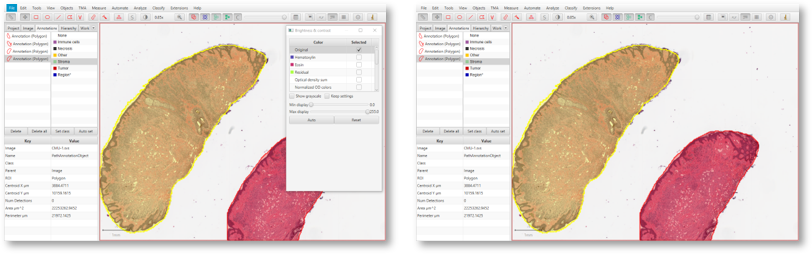
Rendered RGB (with overlays) is similar to Original pixels, except that it depicts the image (or region) as it appears currently in the viewer – with the same colors and brightness/contrast but not necessarily the same pixel values (because of the conversion to RGB). This is therefore useful for creating figures, but not for any later quantitative analysis.
Current viewer content gives a snapshot of how the viewer currently looks. This includes any surrounding background or additional features, such as the cursor location pane or scalebar.
Snapshots
There are two additional options under Export snapshot , which enable exporting more of the QuPath user interface, including toolbars and panels.
Shows what is on screen at the location of the main window (including any overlapping windows).
Shows the main window unobstructed.
All of the Export snapshot… options have counterparts under
Snapshot exports of the Main window screenshot (left) and Main window content (right).
Tip
Sending image regions to ImageJ provides another way to save images – either original pixels or rendered RGB. This opens up ImageJ’s extra functionality, for example adding a custom scalebar.
Export by scripting
As usual, scripts can increase your options and ability to customize what happens for export.
Images & regions
The following scripts show several ‘quick’ methods to export images:
// Write the full image (only possible if it isn't too large!)
def server = getCurrentServer()
writeImage(server, '/path/to/export/full.tif')

// Write the full image downsampled by a factor of 10
def requestFull = RegionRequest.createInstance(server, 10)
writeImageRegion(server, requestFull, '/path/to/export/full_downsampled.tif')

// Write the region of the image corresponding to the currently-selected object
def roi = getSelectedROI()
def requestROI = RegionRequest.createInstance(server.getPath(), 1, roi)
writeImageRegion(server, requestROI, '/path/to/export/region.tif')

// Write the full image, displaying objects according to how they are currently shown in the viewer
def viewer = getCurrentViewer()
writeRenderedImage(viewer, '/path/to/export/rendered.png')
The file format can be adapted by changing the extension.
Tile Exporter
One way to use QuPath is as whole slide image viewing and annotation software, outsourcing analysis to other tools that do not otherwise support large, pyramidal images themselves.
The TileExporter class in QuPath provides options to help export all or part of an image as distinct (possibly overlapping) image tiles of a fixed size, at any resolution.
To use it, you create an exporter for a specific ImageData, customize it as required, then end by calling writeTiles("path/to/export").
/**
 * Script to export image tiles (can be customized in various ways).
 */

// Get the current image (supports 'Run for project')
def imageData = getCurrentImageData()

// Define output path (here, relative to project)
def name = GeneralTools.getNameWithoutExtension(imageData.getServer().getMetadata().getName())
def pathOutput = buildFilePath(PROJECT_BASE_DIR, 'tiles', name)
mkdirs(pathOutput)

// Define output resolution in calibrated units (e.g. µm if available)
double requestedPixelSize = 5.0

// Convert output resolution to a downsample factor
double pixelSize = imageData.getServer().getPixelCalibration().getAveragedPixelSize()
double downsample = requestedPixelSize / pixelSize

// Create an exporter that requests corresponding tiles from the original & labelled image servers
new TileExporter(imageData)
    .downsample(downsample)   // Define export resolution
    .imageExtension('.tif')   // Define file extension for original pixels (often .tif, .jpg, '.png' or '.ome.tif')
    .tileSize(512)            // Define size of each tile, in pixels
    .annotatedTilesOnly(false) // If true, only export tiles if there is a (classified) annotation present
    .overlap(64)              // Define overlap, in pixel units at the export resolution
    .writeTiles(pathOutput)   // Write tiles to the specified directory

print 'Done!'
Tip
When using imageExtension('.tif'), an ImageJ TIFF will be written.
These are uncompressed (so rather large), but retain calibration information (pixel size, origin) – which makes it possible to relate anything later detected back to wherever it was within the whole slide image.
For other formats, the necessary scaling and translation values usually need to be calculated from the exported image file name.