Building from source
Building software can be tricky, but hopefully this won’t be - thanks to Gradle.
Note
Do you need this?! Most people using QuPath won’t need to build QuPath from source! Just download an existing installer from qupath.github.io and use that instead.
Building from the command line
If you’re moderately comfortable working from a command line, there’s not much required to build QuPath:
Install git, e.g. from https://git-scm.com
Install OpenJDK 17, e.g. from adoptium.net
Open a command prompt in an empty directory and run the following:
git clone https://github.com/qupath/qupath
cd qupath
gradlew clean jpackage
git clone https://github.com/qupath/qupath
cd qupath
./gradlew clean jpackage
It will take a few minutes to download everything required and build the software. If all goes well, you should see a triumphant message that the build was successful.

That’s it!
You can find QuPath inside the ./build/dist/ subdirectory.
Which Java version do I need?
If you already have Java installed, you might be able to skip Step 2. Most Java versions >= 8 should work to launch Gradle, which will then automatically download the version it needs. However, since QuPath currently requires OpenJDK 16, we recommend just installing that and saving Gradle the extra effort.
Note that some problems have been reported using a version of OpenJDK based on OpenJ9, such as may be provided by some package managers. Switching to an OpenJDK distribution based on HotSpot may help – see here for details.
Notes for Apple silicon
If you’re working on a recent Mac with Apple silicon, the easiest thing to do is use a Java JDK for Intel. Everything will run a bit slower through Rosetta2 – but the difference might not be noticeable.
If you use a JDK for Apple silicon, most things should work - but note the caveats described on the installation page;
You can add OpenSlide support from the start by:
Installing OpenSlide Java using Homebrew
Building QuPath with the command
./gradlew clean jpackage -P openslide=/opt/homebrew/opt/openslide-java/lib/openslide-java/openslide.jar
This should then use your local OpenSlide installation. The disadvantage is that it won’t be found if you transfer QuPath to another computer.
Customizing the build
Creating installers
If you need to create an installer for QuPath, you can use
gradlew clean jpackage -P package=installer
./gradlew clean jpackage -P package=installer
Note that for this to work on Windows you’ll need to install WIX Toolset.
Adding GPU support
A common question is whether QuPath uses a GPU to accelerate processing. The answer, currently, is ‘no’.
However, it is possible to build QuPath with support for CUDA via OpenCV and JavaCPP by using the -Pcuda or -Pcuda-redist options.
gradlew clean jpackage -Pcuda-redist
./gradlew clean jpackage -Pcuda-redist
You should use -Pcuda if you want to use your own CUDA installation (which needs to be the correct version to match JavaCPP’s OpenCV distribution), and -Pcuda-redist if you want to download the necessary files automatically.
Before doing so you should check out the licensing terms for CUDA at https://github.com/bytedeco/javacpp-presets/tree/master/cuda
Two important things to note are:
This only works on Windows or Linux with recent NVIDIA GPUs and drivers
Currently, only StarDist is likely to see any benefit (no other QuPath code explicitly uses the GPU)
Simplifying builds with gradle.properties
If you often add -P flags when building QuPath, you can store these in the base QuPath directory in a file called gradle.properties.
This also gives a place to add more custom flags that can change the build.
For example, on my Apple silicon Mac I might put the following into gradle.properties:
org.gradle.parallel=true
org.gradle.java.home=/Library/Java/JavaVirtualMachines/temurin-17.jdk/Contents/Home
openslide=/opt/homebrew/Cellar/openslide-java/0.12.2/lib/openslide-java/openslide.jar
djl.engines=pytorch,mxnet,onnxruntime
djl.zoos=all
This tries to speed up the build process by parallelization, specifies which JDK to use, provides a path to OpenSlide, and specifies some Deep Java Library engines that I would like to include.
Then I only need to call
./gradlew jpackage
rather than some elaborate command.
Building a specific version
QuPath releases are associated with different git tags. You can get the code associated with QuPath 0.4.4 by using the command
git checkout tags/v0.4.4 -b v0.4.4
You can then try building it as above, however note that some different versions may require different build commands (e.g. the steps for v0.2.3 are slightly different from v0.3.0). Check out the docs associated with the specific version if this is the case.
Other options
A few other ways to obtain and/or build QuPath’s code are described below. These might be better if you a) don’t like the command line much, or b) want to make changes to the software.
GitHub Desktop
If you’re using either Mac or Windows, GitHub Desktop provides a friendly way to get the QuPath code. The main steps are
Install Atom (a text editor – not essential, but helpful)
Install GitHub Desktop
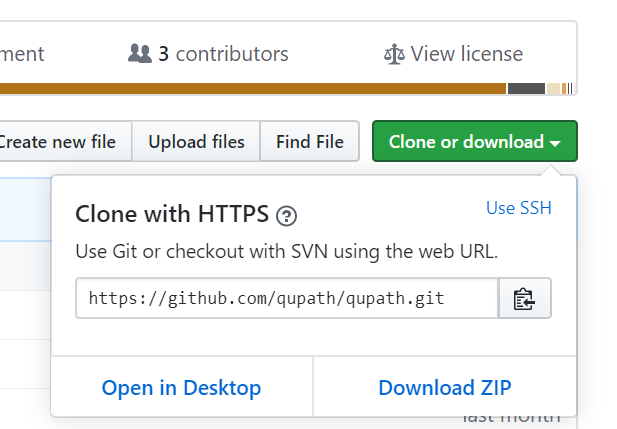
Navigate to https://github.com/qupath/qupath in a browser
Press Clone or download and choose Open in Desktop
You can now open a command prompt in the correct directory directly from GitHub Desktop by choosing .
Installing Git or not?
At this point you may be asked if you want to install Git.
You don’t have to (I think…), but if you do then you’ll be ask a lot of questions during the installation. One of them is to choose a text editor, where you can select Atom.
Finally, the command needed to build QuPath is then the same as above:
gradlew clean jpackage
./gradlew clean jpackage
Updating the code
Once you’ve built QuPath once, updating it to use the latest source code in GitHub Desktop should be easier. The right-most button on the main toolbar serves two purposes: to Fetch information about the latest changes (from GitHub) and to Pull the changes down to your computer.

If the option is Fetch origin, when you press the button the text will switch to Pull origin if any changes are available, with info about the number of changes.
You can press it again to pull those changes, and then rebuild QuPath using gradlew.

Download release
You can circumvent the need to use git entirely by downloading the QuPath code associated with a specific release from http://github.com/qupath/qupath/releases
Simply choose the Source code (zip) or Source code (tar.gz) option. You can then build it from a command prompt as described above.
Running from an IDE
You should be able to import QuPath into any IDE (e.g. Eclipse, IntelliJ) that supports Gradle.
Eclipse
I personally use Eclipse for QuPath development, which allows me to run the software in debug mode – and even change the code while it is running.
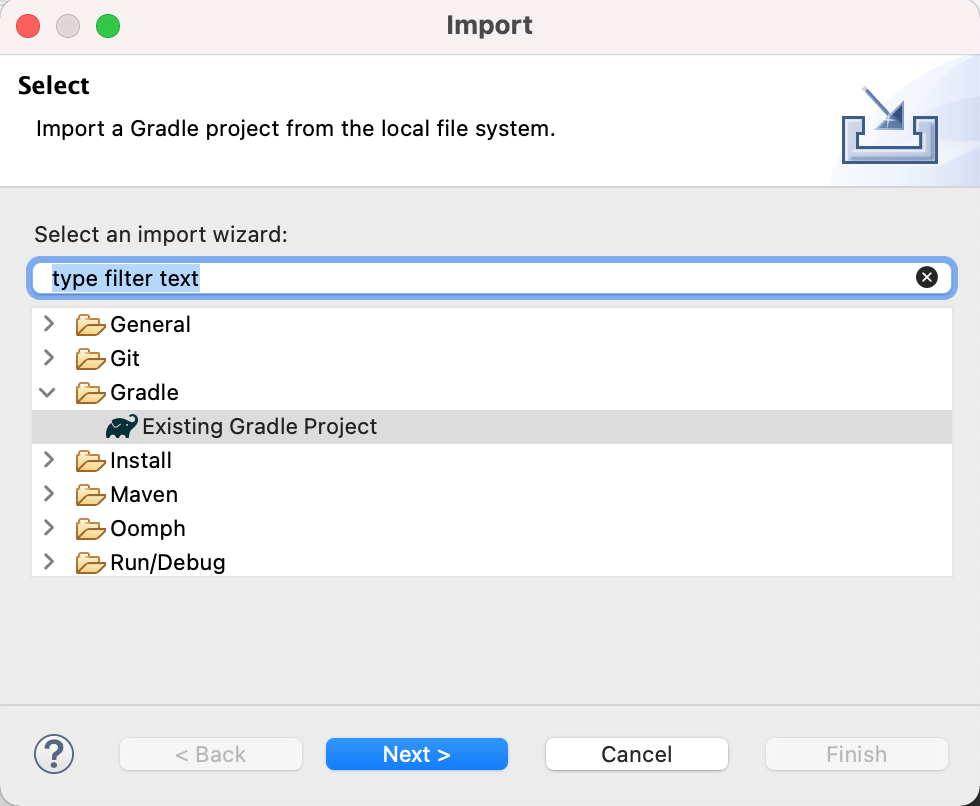
To do this, first download and build QuPath once as describe above. Then use from within Eclipse and select Existing Gradle project.
After selecting the QuPath directory and importing (usually accepting the default import options is fine), right-click on QuPath.java (the main launch class) as shown below:
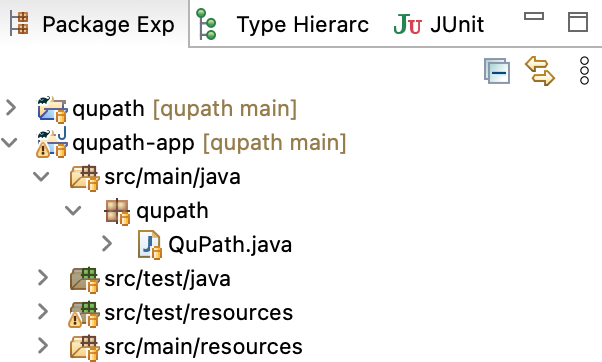
Now choose from the context menu.
This should launch QuPath, but it will fail to find the native libraries it needs to use OpenSlide.
To fix that, use to adjust the arguments for your configuration as shown below, changing -Xmx if needed to customize the memory available.
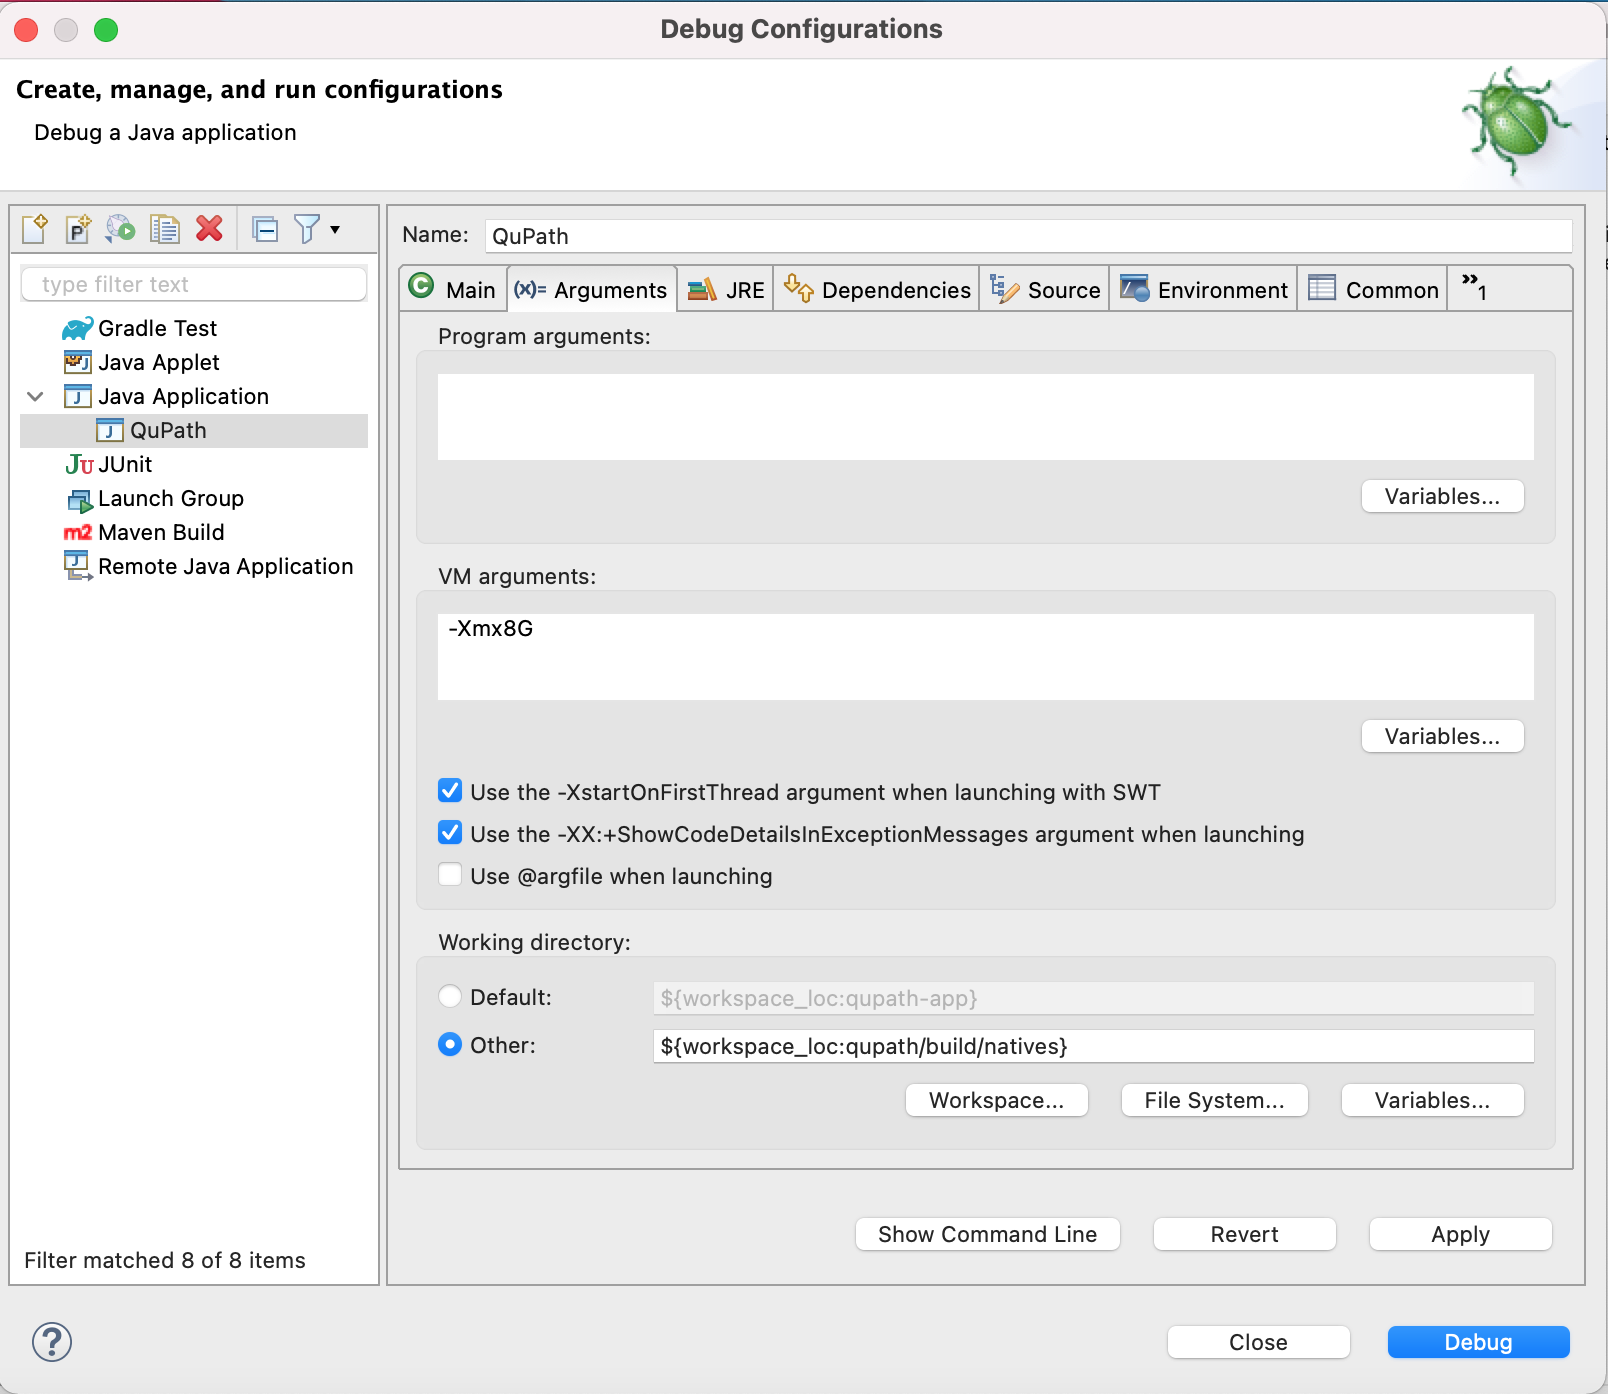
Finally, press the Debug button in the bottom right, and QuPath should launch with OpenSlide intact.
This works because it starts inside the ${workspace_loc:qupath/build/natives} directory, which should contain the OpenSlide native libraries – assuming you have build QuPath at least once before.
You can now use to launch QuPath with the same configuration in the future.
The useful thing about using debug mode is that you can make changes to the QuPath code while QuPath is running and, providing they aren’t too extreme, they will be incorporated into the software without needing to relaunch it.