Custom scripts
You can enter a custom script in QuPath via , and run it by choosing (or pressing Ctrl + R with the script editor in focus).
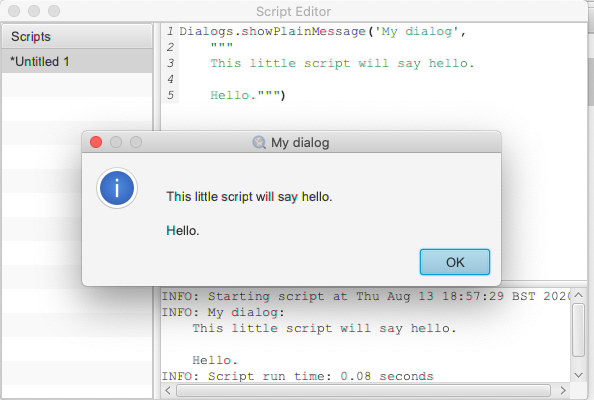
A friendly script.
The user forum is a good source for scripts; scripts are often posted there in response to questions that require a feature QuPath doesn’t quite have yet.
This section provides an overview of some of the main ideas needed to start writing custom scripts in QuPath yourself.
It is based initially on this blog post but should be kept updated as QuPath develops. It assumes you are familiar with the main QuPath concepts.
API docs
You can find QuPath’s API docs at http://qupath.github.io/javadoc/docs/
Default imports
In the Script Editor, there is an option .
If this is selected, QuPath will add the following line to the top of your script:
import static qupath.lib.gui.scripting.QPEx.*
This means you’ve access to all the static methods in QPEx and QP directly. These are used extensively by QuPath when converting workflows to scripts for batch processing.
All the examples below assume that QPEx is imported one way or another.
If you don’t want to rely on the default import, just put that line at the top of your scripts explicitly.
Projects
The following simple script prints the names of all images in a project:
def project = getProject()
for (entry in project.getImageList()) {
    print entry.getImageName()
}
The script below is rather more interesting; it will
Open each image in turn
Extract the annotations from the hierarchy
Print the image name & annotation count per image
def project = getProject()
for (entry in project.getImageList()) {
    def imageData = entry.readImageData()
    def hierarchy = imageData.getHierarchy()
    def annotations = hierarchy.getAnnotationObjects()
    print entry.getImageName() + '\t' + annotations.size()
}
The extra logging messages generated when opening each image can be annoying, so you might want to print everything at the end instead. Creating a StringBuilder can help:
def sb = new StringBuilder()
def project = getProject()
for (entry in project.getImageList()) {
    def imageData = entry.readImageData()
    def hierarchy = imageData.getHierarchy()
    def annotations = hierarchy.getAnnotationObjects()
    sb << entry.getImageName() + '\t' + annotations.size() << '\n'
}
print sb.toString()
Both options are rather a lot slower than they need to be, because QuPath will go to the bother of constructing the full ImageData (including ImageServer) for every image - even though it never needs to actually access pixels.
You can avoid this as follows:
def project = getProject()
for (entry in project.getImageList()) {
    def hierarchy = entry.readHierarchy()
    def annotations = hierarchy.getAnnotationObjects()
    print entry.getImageName() + '\t' + annotations.size()
}
Note
These scripts won’t work in v0.1.2, where the process was much more awkward…
Accessing the current image
The above scripts can access images in a project, regardless of whether they are open in the GUI or not.
Often, you only need to access the image currently open. In that case, just use
def imageData = getCurrentImageData()
print imageData
This gets the image from the current viewer. It is equivalent to:
def viewer = getCurrentViewer()
def imageData = viewer.getImageData()
print imageData
In conjunction with you often don’t need to loop through project images directly - just write a script for the current image, then run that script for all images with Run for project.
Accessing image metadata
To get image metadata, you’ll need the ImageServer:
def imageData = getCurrentImageData()
def server = imageData.getServer()
print server
In recent QuPath milestones, this is equivalent to:
def server = getCurrentServer()
print server
You can then query properties of the image. Simple ones can be accessed directly, e.g.
def server = getCurrentServer()
print server.getWidth() + ' x ' + server.getHeight()
All the key metadata exists in an ImageServerMetadata object:
def server = getCurrentServer()
print server.getMetadata()
Pixel sizes are in a PixelCalibrationObject (different from v0.1.2, where you got them directly from the server!):
def server = getCurrentServer()
def cal = server.getMetadata().getPixelCalibration()
print cal
As a shortcut, you can also use
def server = getCurrentServer()
def cal = server.getPixelCalibration()
print cal
In the past, pixels were either in microns or uncalibrated. In the future, QuPath might need to support other pixel units and so this assumption is a bit less critical than it was before. It is tempting to make pixel size requests more general and elaborate (always asking for units), but for now the need to request pixel sizes in microns is so common that there remain helper methods to do this:
def server = getCurrentServer()
def cal = server.getPixelCalibration()
print cal.getPixelWidthMicrons()
print cal.getPixelHeightMicrons()
print cal.getAveragedPixelSizeMicrons()
You can expect the result to be Double.NaN if the size information is not available.
You can check for this using ‘standard’ Java/Groovy.
double myNaN = Double.NaN

// Two Java/Groovy-friendly ways to check values are 'usable'
print Double.isNaN(myNaN)
print Double.isFinite(myNaN)

// A bad way to check for NaN - confusing because Java & Groovy handle == differently
print (myNaN == Double.NaN) // Don't do this!
Accessing pixels
If you want pixels, you’ll get them as a Java BufferedImage.
To do so, you need to request them from a server with a RegionRequest.
This includes the server path, a downsample factor and bounding box coordinates (defined in full resolution pixel units, with the origin at the top left of the image):
import qupath.lib.regions.*

def server = getCurrentServer()
def path = server.getPath()

double downsample = 4.0
int x = 100
int y = 200
int width = 1000
int height = 2000

def request = RegionRequest.createInstance(path, downsample, x, y, width, height)

def img = server.readRegion(request)
print img
There are two reasons why QuPath uses RegionRequest objects:
You’d otherwise need to pass a lot of parameters to the
readRegionmethodRegionRequestscan be (and are) used as keys for an image cache
In any case, the above script assumes a single-plane image. If you may have a z-stack, you can define the z-slice and time point in your request:
import qupath.lib.regions.*

def server = getCurrentServer()
def path = server.getPath()

double downsample = 4.0
int x = 100
int y = 200
int width = 1000
int height = 2000
int z = 0
int t = 0

def request = RegionRequest.createInstance(path, downsample, x, y, width, height, z, t)

def img = server.readRegion(request)
print img
If you have a selected object with a ROI in the image, you can also use that to create the request:
import qupath.lib.regions.*

def server = getCurrentServer()
def roi = getSelectedROI()
double downsample = 4.0
def request = RegionRequest.createInstance(server.getPath(), downsample, roi)
def img = server.readRegion(request)
print img
Note
The server path previously was an image path and it could be used to construct a new server… but this is no longer the case. Rather, the key thing now is that it must be unique for a server, since it is used for caching.
server.getPath() may be renamed to server.getID() or similar in the future to reflect this.
Setting pixel size
The following script sets the pixel size of the currently opened image:
// Set pixel width and height to 0.5 microns
setPixelSizeMicrons(0.5, 0.5)
Z-spacing, alongside width and height, can also be set with the following script:
// Set pixel width & height to 0.5 microns and Z-spacing to 1.0 micron
setPixelSizeMicrons(0.5, 0.5, 1.0)
Creating ROIs
Warning
Previously, there were public constructors for ROIs. You shouldn’t use these now!
You can create new ROIs using the static methods in the ROIs class.
This will require specifying the z-slice and timepoint.
To avoid passing lots of parameters (and getting the order mixed up), you should instead use an ImagePlane object:
import qupath.lib.roi.ROIs
import qupath.lib.regions.ImagePlane

int z = 0
int t = 0
def plane = ImagePlane.getPlane(z, t)
def roi = ROIs.createRectangleROI(0, 0, 100, 100, plane)
print roi
There are various different kinds of ROI that can be created, including with createEllipseROI, createPolygonROI, createLineROI.
Creating objects
To actually make a ROI visible, it needs to be part of an object.
The PathObjects class helps in a similar way to ROIs - again, you shouldn’t create objects using constructors directly.
This script creates a new annotation with an ellipse ROI, and adds it to the hierarchy for the current image (using the QPEx.addObject() method):
import qupath.lib.objects.PathObjects
import qupath.lib.roi.ROIs
import qupath.lib.regions.ImagePlane

int z = 0
int t = 0
def plane = ImagePlane.getPlane(z, t)
def roi = ROIs.createEllipseROI(0, 0, 100, 100, plane)
def annotation = PathObjects.createAnnotationObject(roi)
addObject(annotation)
To create a detection rather than an annotation, you’d use createDetectionObject.
Putting it together with previous sections, to create square tiles across an entire image for the current ImagePlane we could use:
import qupath.lib.objects.PathObjects
import qupath.lib.roi.ROIs
import qupath.lib.regions.ImagePlane

def imageData = getCurrentImageData()
def plane = getCurrentViewer().getImagePlane()
def server = imageData.getServer()
int tileSize = 1024

def tiles = []
for (int y = 0; y < server.getHeight() - tileSize; y += tileSize) {
    for (int x = 0; x < server.getWidth() - tileSize; x += tileSize) {
        def roi = ROIs.createRectangleROI(x, y, tileSize, tileSize, plane)
        tiles << PathObjects.createAnnotationObject(roi)
    }
}
addObjects(tiles)
Working with BufferedImages
Once you have a BufferedImage, you are already in Java-land and don’t need QuPath-specific documentation for most things.
Scripts like this one to create binary images can then help with one major change.
Previously, you had to do some awkward gymnastics to convert a ROI into a java.awt.Shape object. That’s now easier:
def roi = getSelectedROI()
def shape = roi.getShape()
print shape
Here’s a script applying this to pull out a region from an RGB image for a selected ROI, and show that region in ImageJ along with a new binary mask:
import qupath.lib.regions.*
import ij.*
import java.awt.Color
import java.awt.image.BufferedImage

// Read RGB image & show in ImageJ (won't work for multichannel!)
def server = getCurrentServer()
def roi = getSelectedROI()
double downsample = 4.0
def request = RegionRequest.createInstance(server.getPath(), downsample, roi)
def img = server.readRegion(request)
new ImagePlus("Image", img).show()

// Create a binary mask & show in ImageJ
def shape = roi.getShape()
def imgMask = new BufferedImage(img.getWidth(), img.getHeight(), BufferedImage.TYPE_BYTE_GRAY)
def g2d = imgMask.createGraphics()
g2d.scale(1.0/request.getDownsample(), 1.0/request.getDownsample())
g2d.translate(-request.getX(), -request.getY())
g2d.setColor(Color.WHITE)
g2d.fill(shape)
g2d.dispose()
new ImagePlus("Mask", imgMask).show()
The mask is generated using Java’s built-in rendering of Shapes.
Working with ImageJ
The above is fine for simple cases, but fails to make the most of ImageJ. It doesn’t set the image metadata, so there’s no way to relate back extracted regions to where they were originally in the whole slide image. It also doesn’t work in general for multichannel images.
If you want to apply ImageJ scripting in QuPath, it is best to let QuPath take care of the conversion.
IJTools is the new class that helps with that (or IJExtension to interact directly with the GUI).
The following script is similar to that above, but works for multichannel images and sets ImageJ properties. It also doesn’t create a mask directly, but rather converts the QuPath ROI so that further processing (e.g. to generate the mask) can be performed in ImageJ.
import qupath.lib.regions.*
import qupath.imagej.tools.IJTools
import qupath.imagej.gui.IJExtension
import ij.*

// Request an ImageJ instance - this will open the GUI if necessary
// This isn't essential, but makes it it possible to interact with any image that is shown
IJExtension.getImageJInstance()

// Read image & show in ImageJ
def server = getCurrentServer()
def roi = getSelectedROI()
double downsample = 4.0
def request = RegionRequest.createInstance(server.getPath(), downsample, roi)
def pathImage = IJTools.convertToImagePlus(server, request)
def imp = pathImage.getImage()
imp.show()

// Convert QuPath ROI to ImageJ Roi & add to open image
def roiIJ = IJTools.convertToIJRoi(roi, pathImage)
imp.setRoi(roiIJ)
This introduces another class: PathImage.
This is basically a wrapper for an image of some kind (here, an ImageJ ImagePlus) along with some calibration information.
Often we don’t need the PathImage wrapper, but here we keep it so that we can pass it to IJTools.convertToIJRoi(roi, pathImage) later.
Working with OpenCV
Rather than BufferedImage or ImagePlus objects, perhaps you prefer to write your processing code using OpenCV.
In v0.1.2, QuPath used the default OpenCV Java bindings - which were troublesome in multiple ways. Now, it uses JavaCPP.
However, although OpenCV can be nice to code with it can also be hard to code with interactively. Therefore in QuPath there are helper functions to help convert from OpenCV to ImageJ when necessary. The following shows this in action:
import qupath.lib.regions.*
import qupath.imagej.tools.IJTools
import qupath.opencv.tools.OpenCVTools
import org.bytedeco.opencv.opencv_core.Size
import static org.bytedeco.opencv.global.opencv_core.*
import static org.bytedeco.opencv.global.opencv_imgproc.*
import ij.*

// Read BufferedImage region
def server = getCurrentServer()
def roi = getSelectedROI()
double downsample = 4.0
def request = RegionRequest.createInstance(server.getPath(), downsample, roi)
def img = server.readRegion(request)

// Convert to an OpenCV Mat, then apply a difference of Gaussians filter
def mat = OpenCVTools.imageToMat(img)
mat2 = mat.clone()
GaussianBlur(mat, mat2, new Size(15, 15), 2.0)
GaussianBlur(mat, mat, new Size(15, 15), 1.0)
subtract(mat, mat2, mat)
mat2.close()

// Convert Mat to an ImagePlus, setting pixel calibration info & then show it
def imp = OpenCVTools.matToImagePlus(mat, "My image")
IJTools.calibrateImagePlus(imp, request, server)
imp.show()
Manipulating ROIs
Having met IJTools and OpenCVTools, it may be nice to know there are also RoiTools and PathObjectTools classes.
In all cases, these contain static methods that may be useful.
Here, we see how to create and merge two ROIs:
import qupath.lib.roi.ROIs
import qupath.lib.roi.RoiTools
import qupath.lib.objects.PathObjects
import qupath.lib.regions.ImagePlane

def plane = ImagePlane.getDefaultPlane()
def roi1 = ROIs.createRectangleROI(0, 0, 100, 100, plane)
def roi2 = ROIs.createEllipseROI(80, 0, 100, 100, plane)

def roi3 = RoiTools.combineROIs(roi1, roi2, RoiTools.CombineOp.ADD)
def annotation = PathObjects.createAnnotationObject(roi3)
addObject(annotation)
Working with Java Topology Suite
It’s quite possible that your ROI manipulation wishes extend beyond what QuPath ROIs support directly.
Fortunately, you can shift to the fabulous Java Topology Suite - rather easily.
Here’s an example that will convert a QuPath ROI to a JTS Geometry, expand it, and then create a new annotation from the result:
import qupath.lib.objects.PathObjects
import qupath.lib.roi.jts.ConverterJTS;

def roi = getSelectedROI()

def geometry = roi.getGeometry()
geometry = geometry.buffer(100)
def roi2 = ConverterJTS.convertGeometryToROI(geometry, roi.getImagePlane())

def annotation = PathObjects.createAnnotationObject(roi2)
addObject(annotation)
Serialization & JSON
QuPath v0.1.2 uses Java’s built-in serialization quite a lot for saving/reloading things.
This is quite compact and easy to use, but horrendous to maintain and impractical for sharing data with anything written in another programming language. Still, it lives on in .qpdata files… for now.
JSON, by contrast, is text-based and readable. v0.1.2 already used JSON for project files (.qpproj), but now uses it increasingly where possible.
JSON is not always appropriate (e.g. attempting to represent a full object hierarchy containing a million objects as JSON would be horribly slow, complex and memory-hungry) but it is generally more maintainable and portable compared to Java serialization.
The library QuPath uses to help with JSON is Gson. Gson makes it beautifully straightforward to turn almost anything into a JSON representation and back… if you know exactly what Java class is involved.
Here’s a Groovy example that doesn’t rely on anything QuPath-specific:
import com.google.gson.GsonBuilder

def gson = new GsonBuilder()
        .setPrettyPrinting()
        .create()

def myMap = ['Hello': 1, 'I am a map': 2]
print myMap

def json = gson.toJson(myMap)
print json

def myMap2 = gson.fromJson(json, Map.class)
print myMap2
You may notice that the map you get back doesn’t look exactly the same when printed… what looked like an integer may now look like a floating point value. But otherwise they match.
In practice, when working with generic classes and subclasses things can rapidly become a lot more complex, bringing in the world of type hierarchy adapters and the like.
I have spent a long time battling with these things in the hope that you won’t have to.
Rather than creating your own Gson object, you can request one from QuPath that is pre-initialized to work with a lot of the kind of structures you’ll meet in QuPath.
import qupath.lib.io.GsonTools

boolean prettyPrint = true
def gson = GsonTools.getInstance(prettyPrint)

println 'My ROI'
println gson.toJson(getSelectedROI())

println()
println 'My object'
println gson.toJson(getSelectedObject())

println()
println 'My server'
println gson.toJson(getCurrentServer())
To convert back, you’ll need to supply the appropriate QuPath class.
Because of the magic GsonTools does for you, this doesn’t need to be the exact class - you can use PathObject and get a detection or annotation as appropriate.
import qupath.lib.objects.PathObject
import qupath.lib.io.GsonTools

boolean prettyPrint = true
def gson = GsonTools.getInstance(prettyPrint)

// Get the selected object & convert to JSON
def pathObject = getSelectedObject()
def json = gson.toJson(pathObject)
print json

// Create a NEW object from the JSON representation
def pathObject2 = gson.fromJson(json, PathObject)
print pathObject2

// Confirm that we really do have a *different* object
if (pathObject == pathObject2)
    print 'Objects are the same'
else
    print 'Objects are NOT the same'

// Add the object to the hierarchy to check it matches, with a name to help
pathObject2.setName('The one from JSON')
addObject(pathObject2)
This should also work for an ImageServer:
import qupath.lib.images.servers.ImageServer
import qupath.lib.io.GsonTools

boolean prettyPrint = true
def gson = GsonTools.getInstance(prettyPrint)

def server = getCurrentServer()
def json = gson.toJson(getCurrentServer())
def server2 = gson.fromJson(json, ImageServer)

print server
print server.class

print server2
print server2.class

if (server == server2)
    print 'Servers ARE the same'
else
    print 'Servers ARE NOT the same'

if (server.getMetadata() == server2.getMetadata())
    print 'Metadata IS the same'
else
    print 'Metadata IS NOT the same'
Figuring out a JSON way to represent ImageServers has taken up rather a lot of my time recently… but so far this seems to be working.
Note however that not everything can be converted to JSON.
For example, you can’t do this with an object hierarchy or an ImageData.
You also probably don’t/shouldn’t want to, given the efficiency issues mentioned above.
Nevertheless, where possible QuPath tries to use a representation that may be used elsewhere.
For example, for ROIs and objects, QuPath follows the GeoJSON specification. This should (although I haven’t tried…) make it possible to exchange regions with other software, e.g. get them into Python via Shapely.
Note
Using GeoJSON does impose some limitations; notably, ellipses become polygons.
GsonTools also aims to wrap around OpenCV’s JSON serialization, e.g.
import org.bytedeco.opencv.global.opencv*core
import org.bytedeco.opencv.opencv*core.Mat
import qupath.lib.io.GsonTools

boolean prettyPrint = true
def gson = GsonTools.getInstance(prettyPrint)

def mat = Mat.eye(3, 3, opencv*core.CV*32FC1).asMat()
print gson.toJson(mat)
Eventually this will make OpenCV classifiers JSON-serializable within QuPath and finally avoid needing to retrain existing classifiers when reloading them.
What next?
This post gives an overview of QuPath scripting for v0.2.0. The API has changed considerably before… albeit with quite a lot of resemblance.
The goal is to make everything more logical and easier to extend. Scripting should be intuitive, and allow you do interact with the data in whatever way you like. Admittedly there is more work to do to achieve this… but it’s a start.
For the main classes you’ll need, it should be possible to at least guess their names.
For example, you should avoid using direct constructors for PathObjects and ROIs and use the static classes instead.
Similarly, if you see Tools and the end of a classname you can be fairly sure it contains more static methods useful for manipulating objects of whatever type the classname begins with.
Here’s a list of some classes you might want to import, and their current locations:
import qupath.imagej.gui.IJExtension
import qupath.imagej.tools.IJTools
import qupath.lib.gui.scripting.QPEx
import qupath.lib.images.servers.ImageServer
import qupath.lib.io.GsonTools
import qupath.lib.objects.PathObjects
import qupath.lib.objects.classes.PathClassFactory
import qupath.lib.objects.classes.PathClassTools
import qupath.lib.regions.ImagePlane
import qupath.lib.regions.RegionRequest
import qupath.lib.roi.ROIs
import qupath.lib.roi.jts.ConverterJTS
import qupath.opencv.tools.OpenCVTools
Lest they move again or you need others, you can find them by searching on GitHub or (much easier) setting up QuPath with an IDE like IntelliJ.
In writing this post, I already see things in the API that I don’t like and want to refactor soon… and probably will. When I do, I’ll try to remember to update these scripts.
All of this remains a work-in-progress, but at least now there is some documentation for anyone who wants to script in the meantime.