Deep Java Library
Starting with v0.4.0, QuPath adds preliminary support for working with Deep Java Library.
This makes it possible to use some deep learning models within QuPath. Over time, this functionality will be expanded – aiming to make deep learning much more accessible for the kinds of applications where QuPath is useful.
DJL engines
DJL supports multiple deep learning ‘engines’. By default, QuPath currently includes engines for PyTorch (all platforms) and TensorFlow (all platforms except Apple silicon). If you want to add others (e.g. MXNet, OnnxRuntime), you can do so when building from source.
Important
There are a few important technical limitations to know about:
PyTorch models must be saved as TorchScript (a state dict alone isn’t enough)
TensorFlow models must be stored as Saved Model Bundles (rather than Keras); additionally, TensorFlow doesn’t yet work on recent Macs using Apple silicon - even using the Intel build
Getting started with QuPath + DJL
To start using DJL from within QuPath, download the QuPath Deep Java Library extension.
This should be a .jar file, which you can drag onto QuPath’s main window to install it.
This adds a command . Running this will show you a list of the available engines - usually either PyTorch and TensorFlow, or just PyTorch.
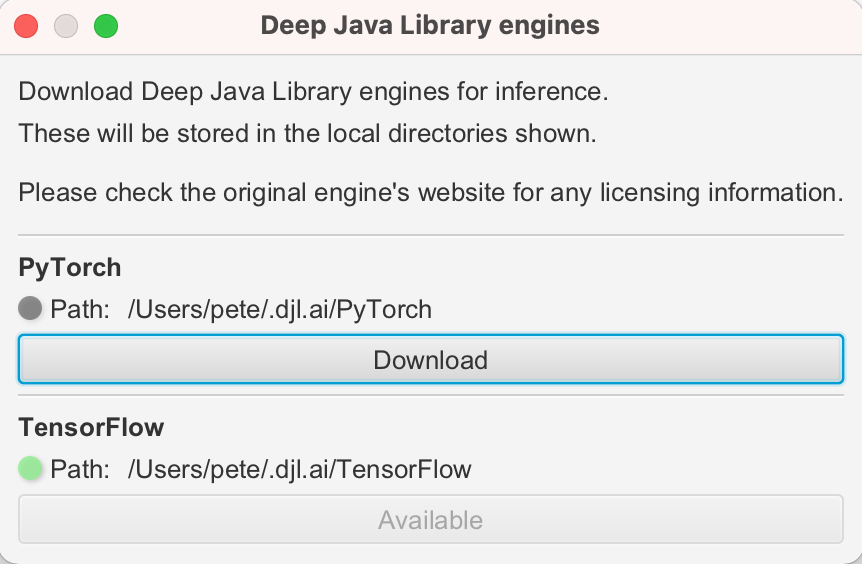
The DJL library manager in QuPath
By default, QuPath doesn’t actually include the PyTorch and TensorFlow frameworks themselves (which are rather big). Instead, DJL can download them when they are needed and store them locally on your computer. This can happen automatically, but QuPath tells DJL not to do that since downloading large files unexpectedly could be troublesome for some users. Instead, you should use the to explicitly request the download.
GPU support
To use an NVIDIA GPU with either TensorFlow or Pytorch, you will need to have a compatible version of CUDA installed before downloading the engine.
See the GPU support page for more details.
If downloading the engine is successful, the indicator beside the engine should switch to green.
Why an extension?
The QuPath Deep Java Library extension is at an early stage and under active development. Keeping it as a separate extension allows us to make updates without needing to make an entirely new QuPath release.
In the future, it might well become included in QuPath by default.
See Extensions for more info.
Using a DJL Model Zoo
The easiest way to see DJL in action is to take a pretrained model from one of its Model Zoos. The zoo houses models for a range of computer vision (and other) tasks.
The DjlZoo class in QuPath helps with accessing DJL Zoo models from a QuPath script.
You don’t need to use it - you can work with DJL directly - but DjlZoo can help make your QuPath scripts much shorter and simpler.
For example, the following script prints a list of available models to the log:
import qupath.ext.djl.DjlZoo
DjlZoo.logAvailableModels()
Tip
The first line, import qupath.ext.djl.DjlZoo is what imports the DjlZoo class and makes it available.
You can alternatively use import qupath.ext.djl.*, which imports other classes that might be useful later.
For DJL, the information about each model is stored as an Artifact.
Here, we access all the artifacts available for object detection, and select the first one.
import qupath.ext.djl.*

var artifacts = DjlZoo.listObjectDetectionModels()
var firstArtifact = artifacts[0].getDefaultArtifact()
println(firstArtifact)
We can see a bit more by converting the artifact to JSON:
import qupath.ext.djl.*

var artifacts = DjlZoo.listObjectDetectionModels()
var firstArtifact = artifacts[0].getDefaultArtifact()
var json = GsonTools.getInstance(true).toJson(firstArtifact)
println(json)
For me, this prints the following
{
  "version": "0.0.1",
  "snapshot": false,
  "name": "ssd_300_resnet50",
  "properties": {
    "size": "300",
    "backbone": "resnet50",
    "dataset": "coco"
  },
  "arguments": {
    "width": 300.0,
    "height": 300.0,
    "resize": true,
    "normalize": true,
    // More stuff
    // ....
  }
Tip
The GsonTools.getInstance(true) means that the JSON will use pretty-printing (i.e. indentation) to make it more readable.
Object detection
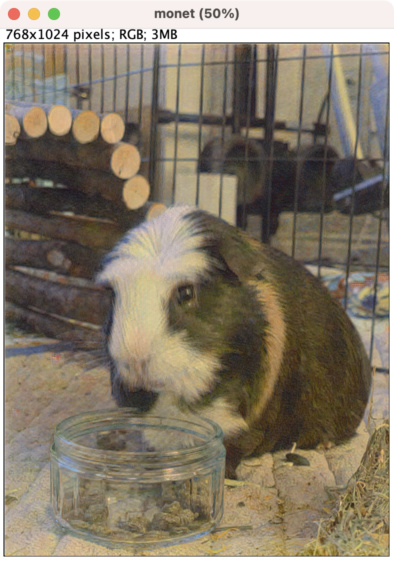
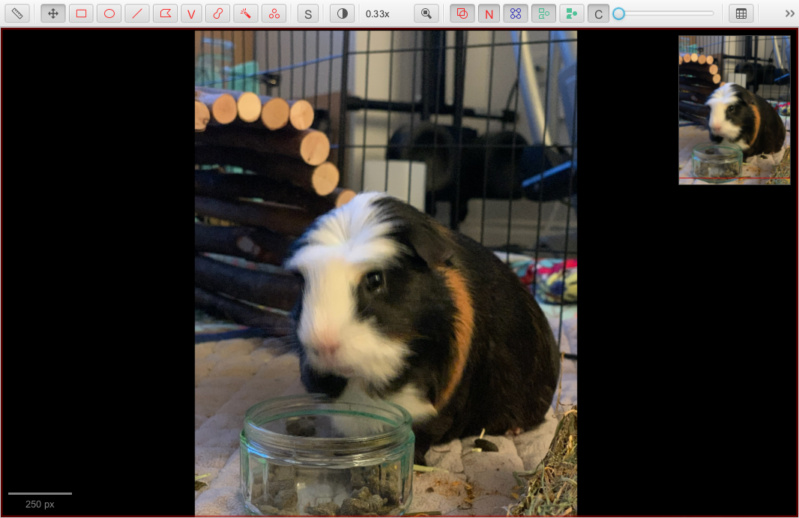
The built-in zoo models are generally intended for ‘regular’ photos, not microscopy or biomedical images. The following script takes a model intended for object detection and applies it to an image of a particularly attractive guinea pig contemplating his pellets.
import qupath.ext.djl.*

// Allow model to be downloaded if it's not already
boolean allowDownsamples = true

// Get an object detection model from the zoo
var artifacts = DjlZoo.listObjectDetectionModels()
var artifact = artifacts[0].getDefaultArtifact()

// Load the model
var criteria = DjlZoo.loadModel(artifact, allowDownsamples)

// Apply the detection to the current image
var imageData = getCurrentImageData()
var detected = DjlZoo.detect(criteria, imageData)
println "Detected objects: ${detected.orElse([])}"

Object detection using DJL model zoo (PyTorch SSD)
Success! Kind of. The detection basically works, and found both the guinea pig and his pellet bowl. These are shown as QuPath annotations with the classifications ‘dog’ and ‘cup’… not entirely correct, but not too bad.
Results are better when applied to this recent photo from a trip to the Northern Irish coast:
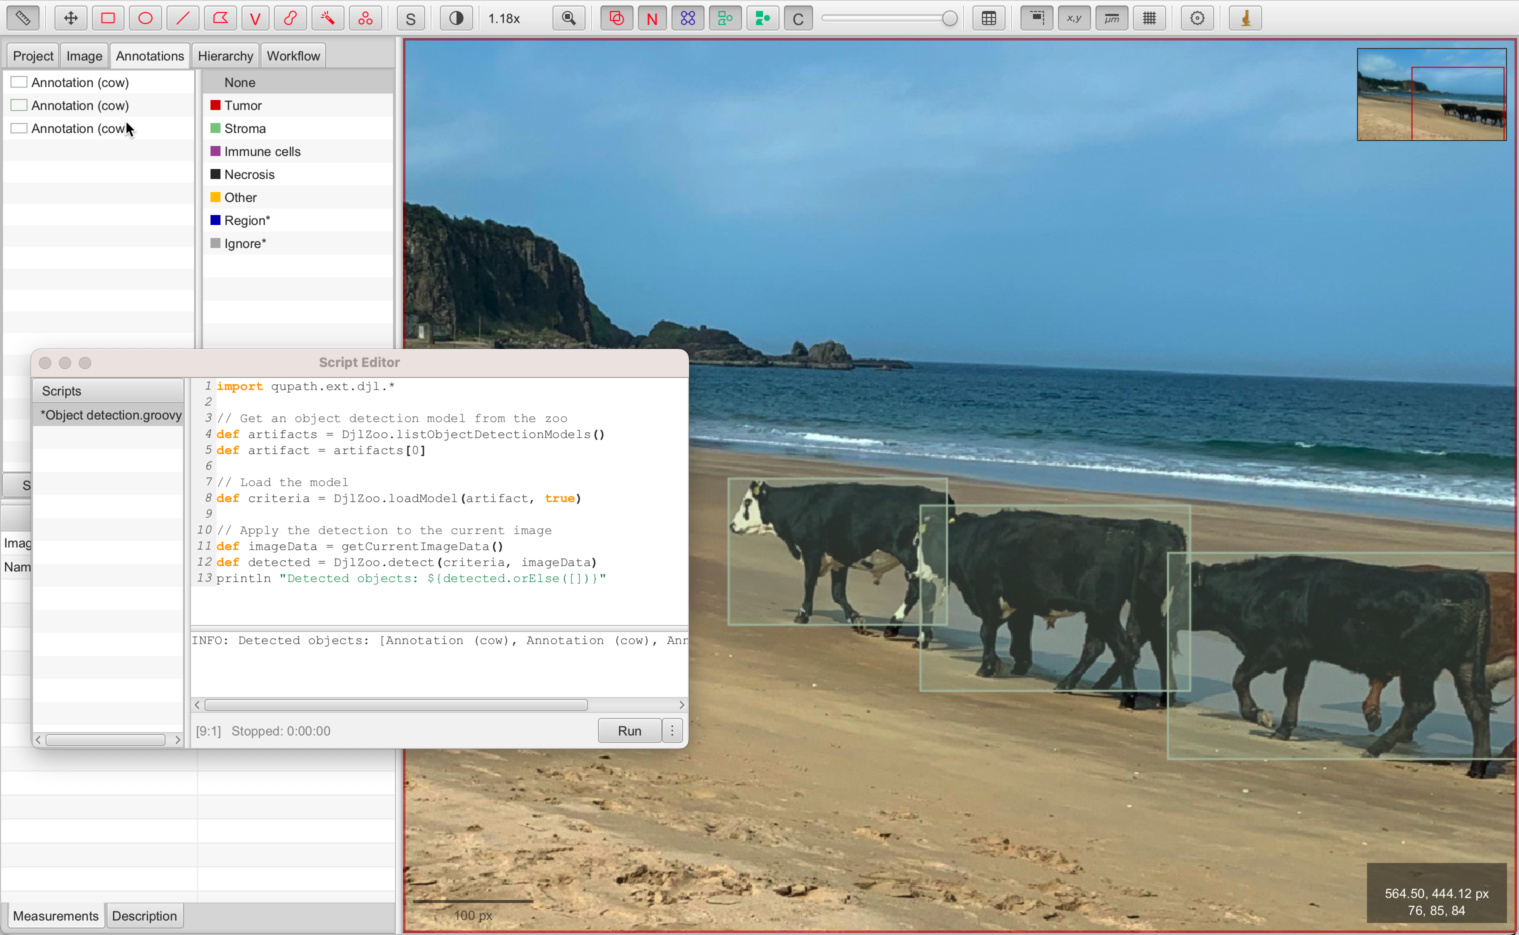
Object detection of holidaying cows using DJL model zoo (PyTorch SSD)
Instance segmentation
A similar script can be used for an instance segmentation model, by accessing available models with DjlZoo.listInstanceSegmentationModels().
Semantic segmentation
The model zoo also contains models for semantic segmentation. These don’t generate bounding boxes, but rather classify each pixel.
The following Groovy script applies a semantic segmentation model, and converts the output to QuPath annotations.
import qupath.ext.djl.*

// Get a semantic segmentation model
boolean allowDownloads = true
var artifacts = DjlZoo.listSemanticSegmentationModels()
var artifact = artifacts[0].getDefaultArtifact()
println artifact

// Apply the model
var imageData = getCurrentImageData()
var model = DjlZoo.loadModel(artifact, allowDownloads)
var segmented = DjlZoo.segmentAnnotations(
    model,
   imageData)
println(segmented.orElse([]))
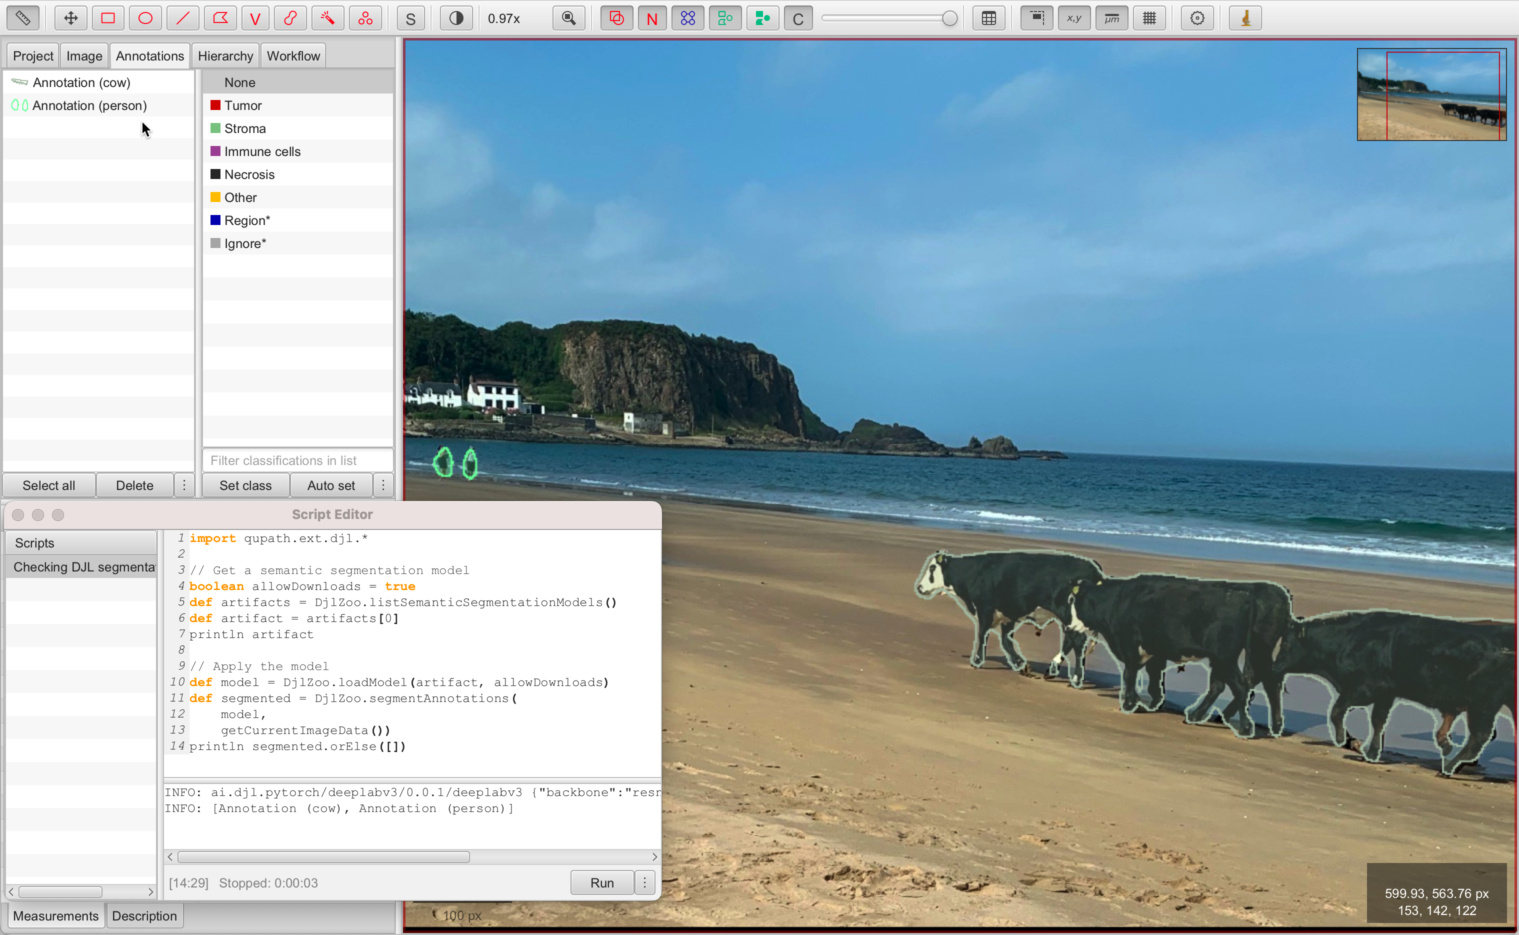
Semantic segmentation of holidaying cows using DJL model zoo (PyTorch DeepLabv3)
Style transfer
Style transfer is another potential use of deep learning. This might be useful for applications such as stain normalization.
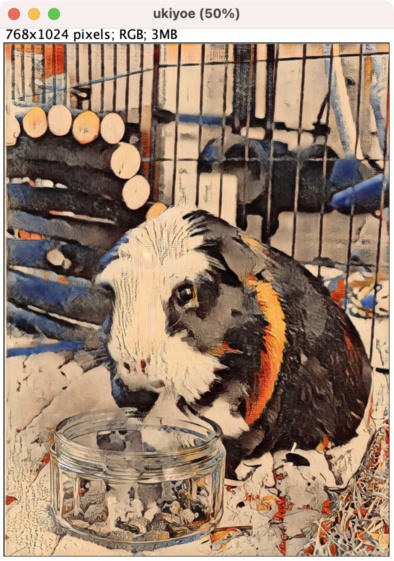
However here we’ll use the DJL model zoo to instead see our guinea pig depicted in the styles of various artists. We convert the output into an ImageJ-friendly form.
import qupath.ext.djl.*
import ai.djl.Application.CV

// Get all the image generation models with an 'artist' property
// Note that other image generation models may not work (since they expect different inputs)
var models = DjlZoo.listModels(CV.IMAGE_GENERATION)
var artifacts = models.findAll(a -> a.getDefaultArtifact().properties.getOrDefault("artist", null))[0].listArtifacts()

// Get an image
// Note: this shouldn't be too big! Define a maximum dimension
double maxDim = 1024
var server = getCurrentServer()
double downsample = Math.max(server.getWidth(), server.getHeight()) / maxDim

var request = RegionRequest.createInstance(server, Math.max(1.0, downsample))
var img = server.readRegion(request)

// Show all the predictions
for (var artifact : artifacts) {
    var artist = artifact.properties["artist"]
    println("$artist is painting...")
    try (var model = DjlZoo.loadModel(artifact, true)) {
        try (var predictor = model.newPredictor()) {
            // Show using ImageJ
            var output = DjlZoo.imageToImage(predictor, img)
            new ij.ImagePlus(artist, output).show()
        }
    }
}
println("Done!")

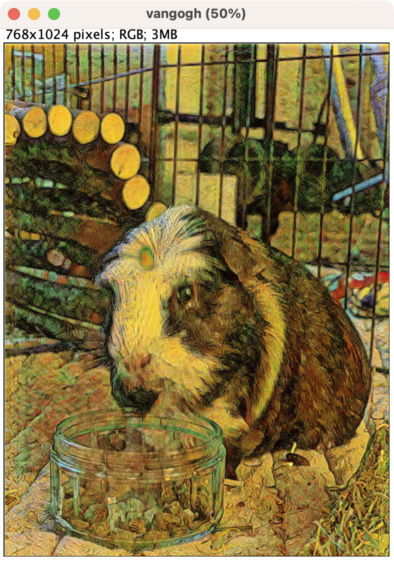
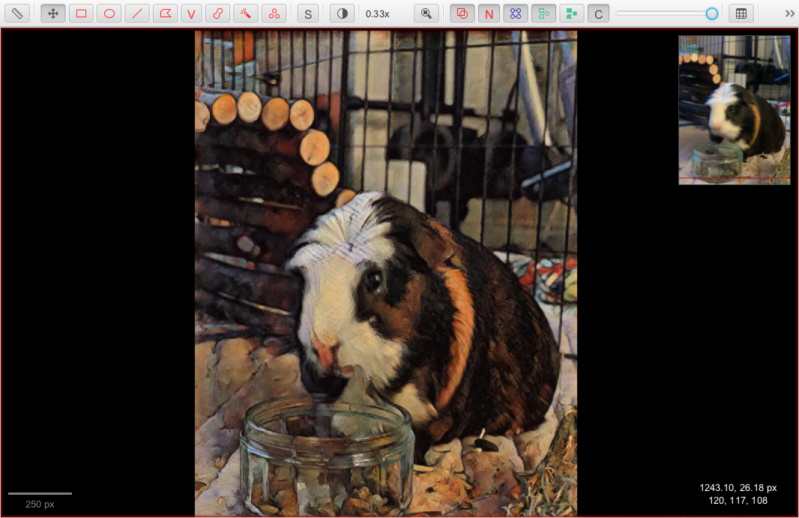
Alternatively, the output image can be displayed in QuPath as an overlay. In this case, it is automatically rescaled to cover the full image. The opacity can be controlled using the slider in the toolbar.
import qupath.ext.djl.*
import ai.djl.Application.CV
import qupath.lib.gui.viewer.overlays.*

// Get all the image generation models with an 'artist' property
var models = DjlZoo.listModels(CV.IMAGE_GENERATION)
var artifacts = models.findAll(a -> a.getDefaultArtifact().properties.getOrDefault("artist", null))[0].listArtifacts()
var artifact = artifacts.find(a -> a.properties["artist"] == "vangogh")

// Get an image
double maxDim = 1024
var server = getCurrentServer()
var roi = getSelectedROI()
double downsample = Math.max(roi.getBoundsWidth(), roi.getBoundsHeight()) / maxDim
var request = RegionRequest.createInstance(server.getPath(), downsample, roi)
var img = server.readRegion(request)

// Show all the predictions
var artist = artifact.properties["artist"]
println("$artist is painting...")
try (var model = DjlZoo.loadModel(artifact, true)) {
    try (var predictor = model.newPredictor()) {
        // Show as an overlay
        var output = DjlZoo.imageToImage(predictor, img)
        var viewer = getCurrentViewer()
        var overlay = new BufferedImageOverlay(viewer.getOverlayOptions(), request, output)
        Platform.runLater {viewer.getCustomOverlayLayers().setAll(overlay)}
    }
}
println("Done!")
Future plans
This only begins to scratch the surface of possibilities for deep learning support in QuPath.
Because Groovy gives access to all of QuPath and all of DJL, a lot more can already be done by scripting - including loading, and even training, your own models. Check out the DJL documentation for more details.
Over time, the QuPath extension and docs will be updated as we make deep learning easier to use without needing to grapple with DJL directly.
Appendix: CUDA via Conda
Getting CUDA installed and then having it play nicely with PyTorch can be quite painful. There are detailed instructions on the GPU support page.